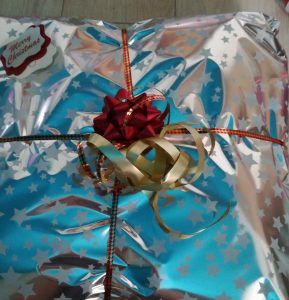
Christmas Gift Wrapping
Here’s the thing: sure, I like opening presents. But you know what? I love wrapping them! I love buying them as well, deciding who I’m going to give what – love it! But the actual process of gift wrapping is probably one of the things I look forward to most each year. Just the fact that it’s so incredibly Christmas-y – what’s not to love?
So, I figured I’d tackle this post in a somewhat orderly fashion: start out with the most basic way to wrap a gift, then move on to the more fun touches… And then send the link to the bf, so maybe he’ll figure out how to do that himself this year 🙂
1. Basic Gift Wrapping: a Step by Step
What you’ll need:
- A gift
- Wrapping paper
- Scissors
- Sticky tape
- Ribbons
How to do it:
1. Cut your wrapping paper so that is approximately 5 times as long and 3 times as wide as your gift – you want it to be able to wrap all the way around the gift!
2. Place your gift approximately in the middle of the wrapping paper.

3. Fold over two of the (opposite) edges on the outside, so that your cut seems to be nice and clean.
4. Fold the two edges that you folded over together so that one covers the other on top of the present, sticky tape them stuck

5. Now you’ve created a long, rectangular shape. Take one of the parts with “left over wrapping paper” that hasn’t been folded yet, and fold it into a triangle.
To do this, you simply first fold the left upper corner towards the right corner of the present, then you fold the right upper corner towards the left corner of the present. Sticky tape it stuck – it doesn’t have to look pretty at this point!


Now do the same for the other side!
6. Usually, you’ll still have some of the wrapping paper sticking out at the sides – simply push this inwards, between the gift itself, and the triangle you folded over and stuck to the present. Here, I’ve already done this to the upper part of the present, but not yet to the lower part:

7. Now, if you want, you can basically stop here – you’ve got a nicely wrapped present. However, if you want to give it at least that extra touch, you leave your present on the floor, sticky side up, and you put a nice ribbon underneath it. You’ll then lift the two ends of the ribbon and pull them towards each other until they cross. At this point, you want to bend them about 90°, so they’re now going to cover the other side of the present. It should look something like this:

8. Next, you want to turn your gift upside down, so that it’s facing right side (so: non-sticky taped side) up. Here, you want to, again, bring the two ends of the ribbon together, and put a simple knot in them. If you want to, you can first cross them again under the ribbon that’s already on that side, so that the ribbon won’t be able to move around.

9. Now, at this point you can add any extra ribbons for decoration, tie in a little card, curl your ribbon, or whatever you want- and then you’re done!

So, that was the simple version – now for some…
2. The fun touches
- Contrast your wrapping paper and ribbons:

- Use a basic brown wrapping paper and liven it up with washi tape and all sorts of bows!


For round objects you can:
- wrap them up like a bonbon: simply roll them up in the wrapping paper and tie two ribbons around it!

- use the same method as for an “ordinary” gift, but rather than fold the left over wrapping paper into a triangle, you basically just push it all together so that you can sticky tape it into place. Add a nice little bow, and it looks pretty good!:

- If you really want to go all out, you can use the wrapping paper itself to create a huge bow: you basically just roll it up, but make sure to cut your wrapping paper about 3 times as long as your actual gift. Then, after rolling it up, you just fold the two parts of wrapping paper inwards, and tie them together:


And there you have it, that’s how I’ve been wrapping my gifts this year. The best part? I took all these pics in late September – I still had a couple of gifts left to buy (or make!) at that point, but, you know… I really love gift buying and wrapping?
Be sure to check out the rest of this year’s Christmas posts as well, and come back tomorrow for some gift ideas on a budget!
-Saar


